Working with invoicing or manual payment
If you don’t want to take payment at the time of booking you can use invoicing or handle the payment manually. It’s also possible you just want to show a price, but keep the rest of the payment process out of the booking system.
If you don’t want to track payment in SuperSaaS, select on the Process tab under Require payment or approval? If, instead, you want to use invoicing or keep track of payments manually, select . Note that “Complete payment” in this context means “go through the payment step before the booking is finalized”. Depending on your setup, that can mean “send invoice”, “show manual payment instructions”, or “deduct credit”; it does not necessarily imply that money is captured immediately.
Invoicing
To be able to use invoicing you will need to have an account with a supported Invoicing Provider. At this time we support Stripe, PayPal, Paystack and Moneybird. You would need to create an account on their site before you can set up invoicing at SuperSaaS.
How invoicing works
When invoicing has been configured and a user creates an appointment, they will see a “Create invoice” button on the checkout screen. After the user clicks this button the invoice will be stored until it’s time to send it. When the time comes, it will be sent on to your invoice provider who will send the invoice to the customer. The invoice provider can track whether the invoice has been paid. In SuperSaaS you can only see whether the invoice has been sent yet.
On the Payment Setup screen you specify how long after (or before) the appointment the invoice should be sent. Rescheduling a booking, will cause the invoice to be rescheduled as well (assuming it hasn’t been sent yet). If you delete a booking before the invoice has been sent, the invoice will no longer be sent. The Payment Setup screen contains a link to a list of all invoices waiting to be sent. There you can manually delete invoices, or send them immediately. Bookings that have an invoice waiting to be sent will also be marked with an on the schedule.
Note that invoices are generated in batches, so it can take some time for an invoice to appear. When you look at a booking on your schedule or on the Supervise screen, it will indicate whether the invoice has been sent with the indicator and the text “Invoice Sent”.
Invoices support taxes and deposits, but the implementation varies between invoicing providers. You would want to create a test invoice beforehand to ensure tax or deposit are displayed as intended. Taxes and deposits can be set using pricing rules Advanced Pricing Rules.
Setting up invoicing
Setting up invoicing has two parts: first, switch on the invoicing flow for the schedule, and second, add the credentials for your invoice provider on the Payment Setup page.
- On the Process tab, under Require payment or approval?, select and click at the bottom of the screen. This will take you back to the Overview tab of the configuration screen.

- Select the Process tab again and click on the Payment set up link to the right of the Require payment or approval? section header.

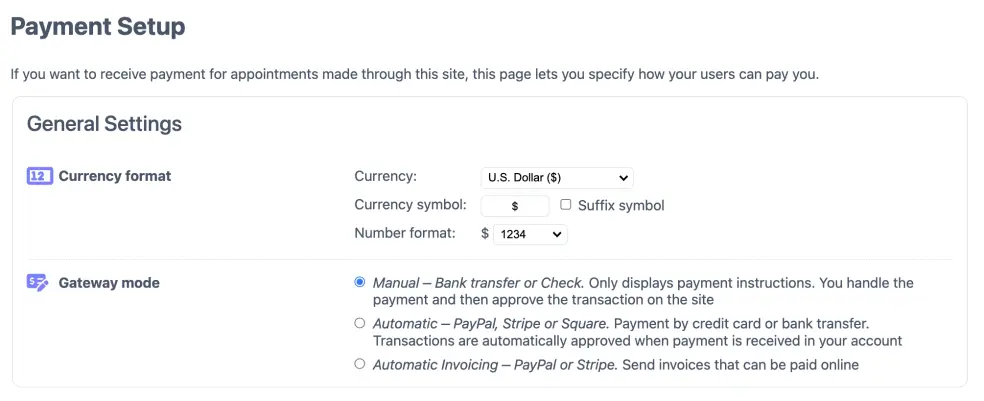
- Under ‘General Settings’, select the gateway mode:

- Scroll to the bottom of the page to the heading “Invoicing Settings” and complete the required information for the provider you selected.

Stripe
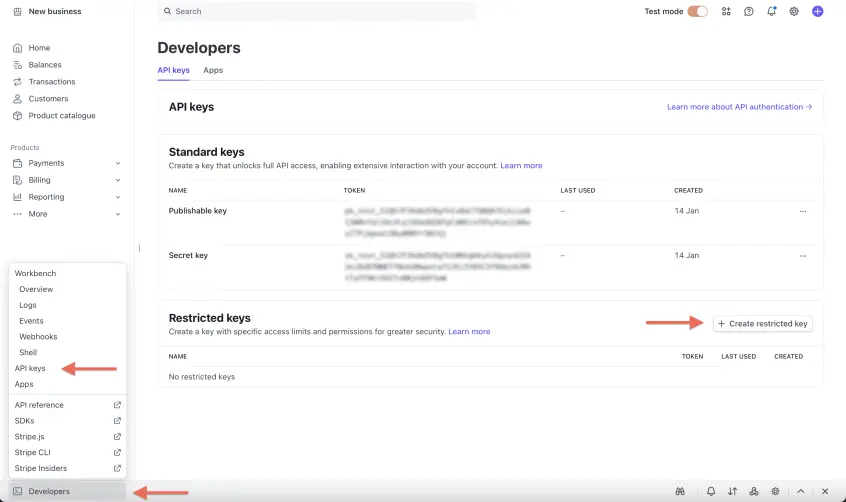
For Stripe navigate to the “API keys” section in your Stripe account.
- Create a new “Restricted key”. Select the option “Building your own integration”.
- On the next screen give the key a name and provide “write” permission on the “Customers”, “Credit notes” and “Invoices” resource types.
- Copy this new “Restricted key”.
- Now toggle the “Test Mode” switch on the top of the page, and repeat those steps to get a “Restricted” test key. The test key is used for simulating invoices without actually sending them, while the live key will actually send invoices to your customers.
- Add the keys on the Payment Settings page and click
- Also ensure you have enabled at least one payment method in the Payment Methods section in your Stripe account. This allows you to specify the way your customers can pay their invoice online.
- If you have set up taxes in the pricing rules then the taxes will be displayed on the invoice.
PayPal
For PayPal navigate to the “My Apps & Credentials” section in your PayPal developer Dashboard.
- Create a new “App”.
- Name it something like “SuperSaaS” and ensure the “App Type” is set to “Merchant”.
- Select the correct Business Account and press “Create App”.
- On the next screen you need to copy the “Client ID” and “Secret”.
- On this same screen can also restrict the permissions for this App, we recommend to only leave “Invoicing” enabled.
- Press “Save” and go back to the “My Apps & Credentials” screen.
- Now toggle to “Live” mode at the top of the screen and repeat the above steps to get the “Live Client ID” and “Live Secret”. The test key is used for simulating invoices without actually sending them, while the live details will actually send invoices to your customers.
- If you have set up tax in the pricing rules, the invoice will include taxes. PayPal uses a different rounding method for the last cent, which can result in a 1 cent difference between SuperSaaS and PayPal under some circumstances.
Moneybird
- Just click the button “Connect to Moneybird”. This will open a new window redirecting you to Moneybird and set up the connection.
- Moneybird will ask you to which Administration you want to connect.
- SuperSaaS will use the default “Invoice Workflow” and “Corporate identity” of the selected Administration. You can adjust these inside Moneybird to change the look and feel of your invoices.
- Taxes are displayed on the invoice. It is better to avoid adding fixed tax amounts, and instead use tax (VAT) percentages that correspond to your country settings.
Paystack
For Paystack navigate to the “Developers” section in your Paystack account.
- Copy the “Live Secret Key”.
- Copy the “Test Secret Key”. The test key is used for simulating invoices without actually sending them, while the live key will actually send invoices to your customers.
- Add the keys on the Payment Settings page and click
- If taxes or deposits are used then the invoice currently does not display all the line items, but a total with taxes or deposit.
Invoice Ninja
To set up Invoice Ninja, navigate to the “Dashboard” section in your Invoice Ninja account.
- Go to “Settings”, then “Account Management”, where you can create “API Tokens” by clicking the “New Token” button (note: a paid account is required). Copy the token.
- Then in the SuperSaaS dashboard on the “Payment Setup” page, under “Invoice providers”, click on “Invoice Ninja” and paste the token into the provided field (note: the “Invoice Providers” section is only visible after selecting “Automatic Invoicing” as explained above).
- Click the button.
- In the Invoice Ninja dashboard, set your company’s details. Under “Localization”, configure the currency and language for your invoices, and finally, under “Payment Settings”, set up your payment methods.
- We recommend testing the invoice and performing a test payment in test mode (if available) before sending invoices to your customers.
- Tax information will be sent to Invoice Ninja if you have set it up in the Pricing section on the SuperSaaS dashboard. More information about setting up taxes.
Manual payment
If you would like to receive payment, but would rather not use one of the integrated payment options, SuperSaaS offers you the option to handle payments manually. Upon check-out, clients are presented with payment instructions and once you receive their payment, you manually approve their booking through the site. This option can be used with Venmo, or to request checks or bank transfers.
Provide payment instructions
- On the Process tab, under Require payment or approval?, select and click at the bottom of the screen. This will take you back to the Overview tab of the configuration screen.
- Select the Process tab again and click on the Payment set up link to the right of the Require payment or approval? section header.
- Under ‘General Settings’, select the first gateway mode: and click . This will take you back to your Dashboard.
- Navigate back to the configuration screen of the schedule in question and select the Layout tab

- Near the bottom of the page, you can find the field Message to display at the checkout screen. Here you can enter your payment instructions, like “Please send a check made payable to MyCompany”


Note that a custom domain will only be shown in combination with the payment screen if it’s being served over HTTPS. If your custom domain does not have HTTPS then upon connecting to the secure server, the system will automatically change the domain. Upon leaving the payment section, the system switches back to using the custom domain.