Working with a credit system
You can offer your clients the option to pay you with credits they received from you or that were bought in the webshop associated with your SuperSaaS account. Provided credits are shown as currency, clients can even use their credit in combination with online payment.
The credit system is an easy way to provide discounts and handle refunds. You can provide new customers with a starting credit, which is automatically applied to their first purchase(s). Similarly, you can give credit in, for example, dollars or euros to individual customers, which provides them with a discount towards their next purchase. This can also be useful to refund a booking, without money changing hands. You could even give clients unlimited credit if you have some other payment arrangement with them.
Another way to use the credit system is to allow your clients to buy credits from your webshop and use them to pay for services and/or resources provided by you. You can set an expiration date or have them be valid indefinitely.
For example, a student might pay $200 for 10 lessons of $20 each, which they can then book at their own convenience and without having to pay for each individual lesson. You can choose whether credit is shown as currency or in credits. In the previous example, we could have sold 10 credits for $200 and each lesson would cost 1 credit.
These credits function like a regular currency – you could price something at, say, 1.5 credits – but they can only be obtained upfront. If, instead, credit is denominated in your local currency, clients can partially pay with credit and pay the remainder via PayPal, for example.
Find instructions on how to set up and operate a credit system here:
- Enable the credit system
- Configure a starting credit
- Manage an individual client’s credit
- Set up your webshop
- Direct clients to your webshop
Enable the credit system
In practice, setup usually has three parts: enable the credit system, decide how credits should behave, and then optionally add products to your webshop so users can buy credit themselves.
- On the Process tab, under Require payment or approval?, select and click at the bottom of the screen. This will take you back to the Overview tab of the configuration screen.
- Select the Process tab again and click the Payment Setup link to the right of the Require payment or approval? section header.
-
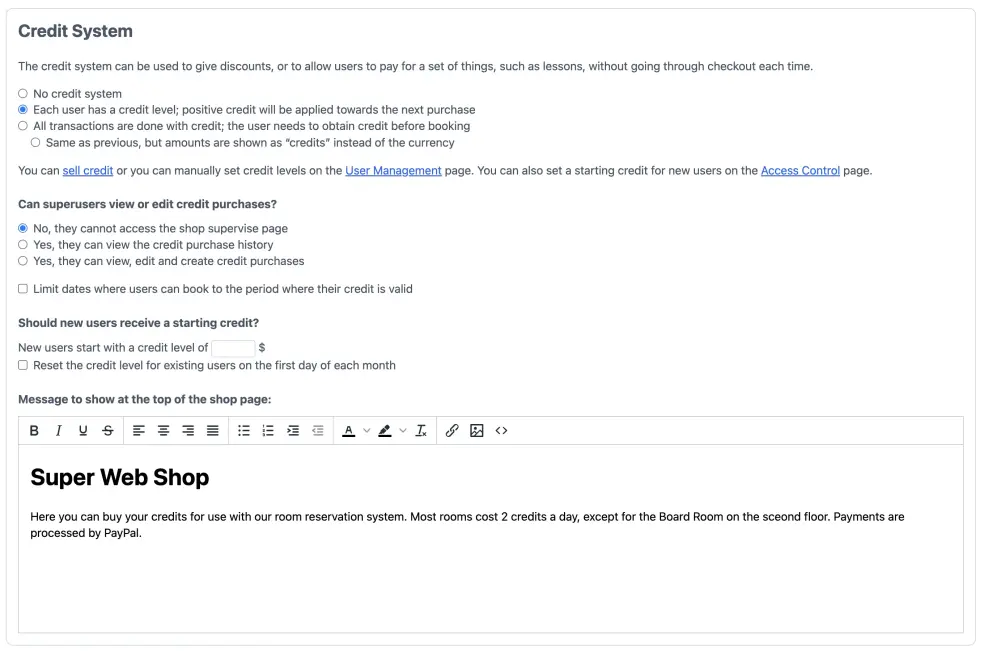
Under “Credit System”, select either the second or third option. Depending on whether you want to use credits primarily to provide discounts and refunds to clients (option 2: Each client has a credit level; positive credit will be applied towards the next purchase) or have your clients use credits to pay for services and/or resources (option 3: All transactions are done with credit; the client needs to obtain credit before booking).
If you would rather work with credits than with currency, select the radio button under option 3, that says: .
When you enable the credit system, a credit field will be added to each of your clients’ profiles. If a client has credit, it will be applied to their next transaction. A non-zero credit is shown in the top-right corner of your client’s screen.
If you would like to show a message at the top of your webshop page, you can edit and format it on this page as well.
-
By default, users can use their credit to book any appointment as long as their credit is valid. If you instead want to only allow them to book on dates where their credit is still valid, go to Payment Setup and select this option:
Keep in mind that this setting is only visible when you have added a product to your Shop Management. For an explanation on how you can add a product, see Setting up your webshop.
A side effect of this setting is that credit will not be returned upon cancellation if the credit has expired.
- Click . This will take you back to your Dashboard.
Configure a starting credit
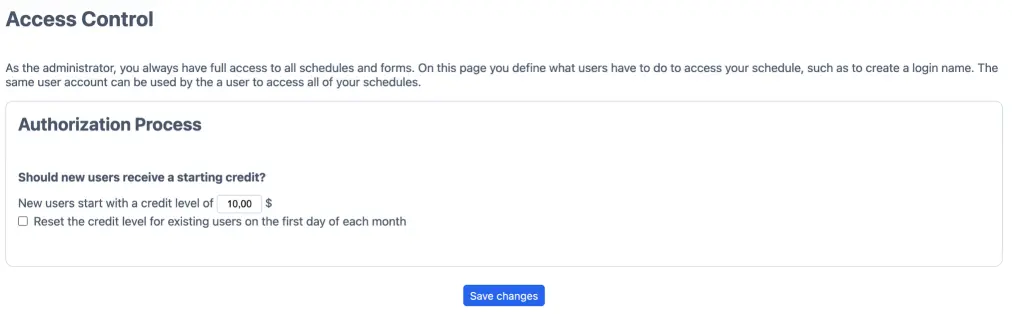
- On the right-hand side of your Dashboard, under the section “Users”, select the option Access Control
- Scroll to the bottom of the screen, where you’ll find the section Should new users receive a starting credit?
- Provide the credit level that new customers should start with. If you want to reset the credit level for existing clients to this level on the first day of every month, you can do so by checking the checkbox under this section
- Click . This will take you back to your Dashboard
Manage an individual client’s credit

- On the right-hand side of your Dashboard, under the section “Users”, select the option User Management
- Find the customer whose credit you want to manage, either by scrolling through the list or using the search function, and click the “edit” icon on the right of the client’s details
- Enter the value into the credit field. If you want to provide this client with unlimited credit, simply enter a minus sign (−) into the credit field
- Click
Set up your webshop
In order to sell credit and/or products in your webshop, you need to have a payment provider. By default, the system uses PayPal, see “Setting up PayPal” for details, or you can configure another payment provider.
- Assuming that you haven’t yet added any items to your webshop for any of your schedules, go to your Dashboard and select the option Payment Setup under the yellow section ‘Preferences’. This takes you to the Payment Setup screen
- Under the section “Credit System”, select the link sell credit. This takes you to the ‘Shop Management’ screen
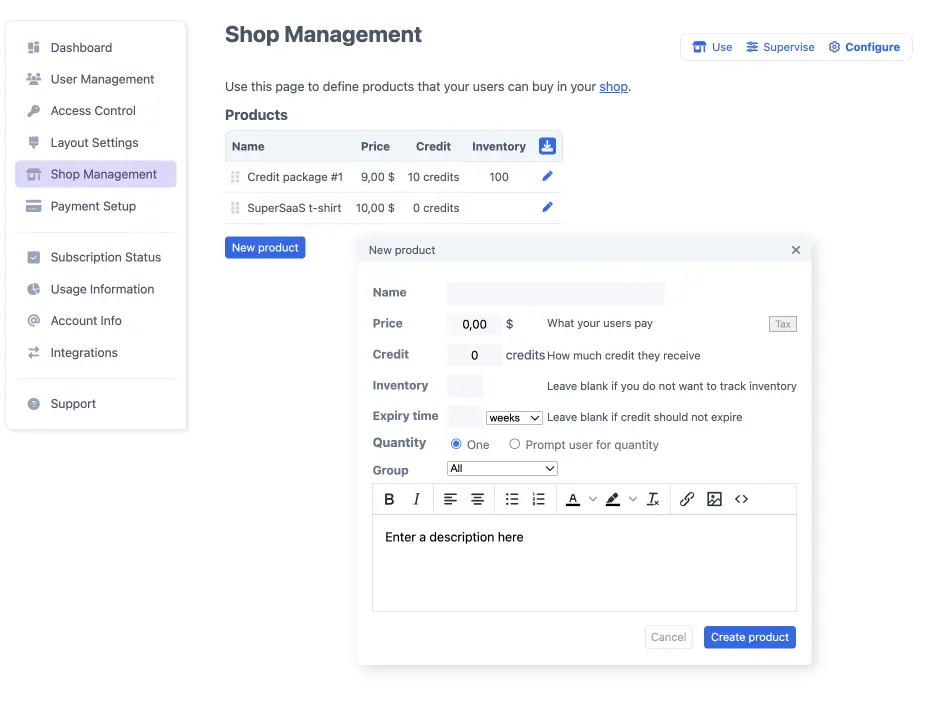
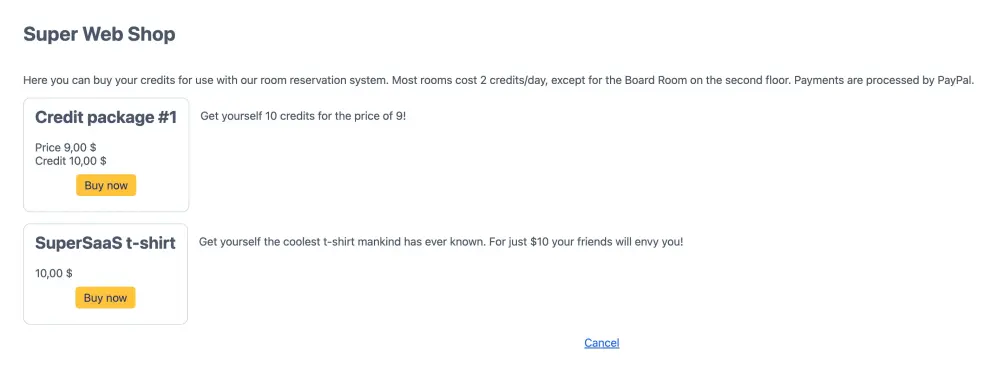
- Click and fill out the fields as desired. Note that by offering more value in credit than is paid for in currency you can make it attractive for clients to pay with credits. If you intend to sell expiring credits, enter a time frame in the “Expiry time” field. The Supervise page on the Shop Management screen shows the history of credit purchases. The buyer can view their “Purchase history” on their “Your settings” page.
- Click
Note that once you have added at least one item to your webshop, a Shop Management option is added to the Applications section of the menu on the right-hand side of your Dashboard as well as on various configuration screens.
Adjust expiring credits
You can adjust an individual’s credit on the User Management page as described above, but you need to be aware that if credit was bought in the shop the system will update related purchases to keep the credit count consistent. The way this automatic adjustment happens may not always be what you want, especially for expiring credit. Specifically, if you remove credits the system will take away any non expired credit, starting with the oldest still valid. If you add credit it will be added to the most recent purchase with remaining credit, and if there is no such purchase it will be added as credit without an expiry date. If this behavior is not what you want, you can adjust the credit purchases manually on the Supervise section of the Shop Management page.
On the “Supervise” page the history of still-valid credit purchases have an “Expire Now” icon next to them. If you click on this icon, the credits expire immediately and the remaining credit from that purchase is taken away from the user. The “Expire now” icon now turns into an “Undo” icon which allows you to revert the action. The edit icon allows you to change the expiry date, by setting the expiry date to a dash (−) the credit will never expire.
Similarly, if you manually increase a user’s credits on the User Management screen they will not be part of any package, and will therefore never expire. If that’s not desired you can use the button . This allows you to enter a username and an expiry date. You can enter a dash (−) for the credit level to give a user unlimited credit for a limited time.
Taxes
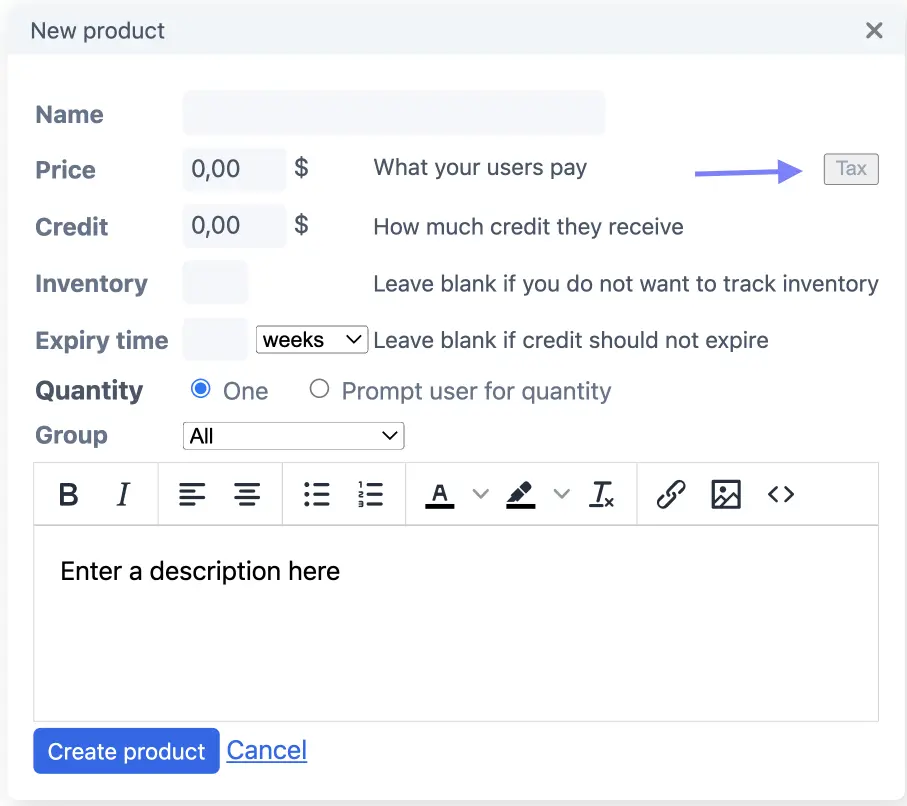
If you want to specify tax on a product in the shop, you can do so by clicking the small “Tax” button when creating a new or editing an existing product. You can choose either an inclusive tax sum (for example VAT) or exclusive tax sum (such as sales tax). To avoid charging tax twice, the system will not charge tax again when credit is subsequently used to pay for an appointment, so any price rules regarding tax will apply only to regular payments.
The specific way taxes are displayed depends on the payment provider. Almost all payment providers offer a way to display tax, however, some providers do their own tax calculations and may end up with a few cents difference due to rounding compared to what is shown on SuperSaaS. Unfortunately there is no universally agreed way to calculate tax that would show the same result everywhere. The difference should be one or two cents at most, but you will want to make a test payment to confirm whether tax is displayed as intended, and adjust the amount if needed. Most providers offer a way to include metadata with the payment. The tax as calculated by SuperSaaS will be specified in the metadata, so it can be used for further processing.
Test payments in the shop
You can test the payment process using our test payment button. It simulates the payment process without using a third party provider. It becomes available when you switch on the Test Mode. By using the test button you can easily experiment with buying things without having to go through the checkout process.
To activate the test button, go to the bottom of the Payment Setup page. Under Gateway Settings check the option A blue test button will now appear next to your products on the Shop page.
Direct clients to your webshop
How will your clients find your webshop?
If a customer does not have any credit and you sell at least one item in your webshop that yields credit, the system will automatically show a “buy credit” link above the schedule.
This link is created by using the magic word $auto in the standard text above the schedule.
Hence, if you put your own text there, the link won’t be visible anymore, unless you reveal it again by adding $auto to your text.
Alternatively, you could use the magic word $shop in the text above the schedule. This generates a link to the shop that is always visible, even if your customer has sufficient credit.
- On the Configuration screen of your schedule, select the Layout tab
- Scroll down to the section “Custom messages”
-
Edit and format your message in the field labeled Message to show in the white space above the schedule.
To automatically show a buy-credit-link if a client does not have any credit, include the magic word
$autoin your message. This will reveal the text “Please buy credit before creating a new reservation”. You can edit your own reservations by clicking on them when the client does not have credit.If, instead, you would like to create a permanent link to your shop, then you should use the magic word
$shop. For example, “Please buy credits in our$shop” will generate the message “Please buy credits in our shop”, where the word shop is a link to your webshop. - Click
An alternative way for your clients to get to your webshop is via the Buy credit link. This is located next to their credit level in the “Edit your information” screen, which is shown upon selecting Your settings in the upper-right corner of the screen.
The message at the top of the shop page can be edited and formatted on the Payment Setup screen, under the section “Credit System”.
Return after the purchase
By default, your users are returned to the schedule where they came from before entering the shop. If they were sent to the shop page directly, without visiting a calendar first, they will be forwarded to the first schedule on your dashboard. You can instead allow them to choose a calendar by selecting the option on the Access Control page.
$after your_url in the text to be shown above the shop.
The user will be forwarded to that URL after the payment completes.