Adjust views and their proportions
All schedules provide different ‘views’, such as showing the calendar by day, week or month, or as a list of available spaces. You can modify which views should be available to the end user, along with various other settings such as size.
Views
By default, desktop users have five views available to them, namely a Month, Week, Day, Agenda and Available time view. These are shown as light blue tabs on your schedule. If any of these views are not relevant to your schedule, hide them by unchecking the corresponding checkbox on the Configure > Layout tab. You can also select the default view; the view users see when they open your schedule.

The calendar view (month, week, or day) works well on desktop but may not always display properly on smaller mobile screens depending on the chosen configuration. In that case you can select . This will show the “Available” view to mobile users even if the default is set to Month, Week, or Day.
To hide the “month navigator” (the small month calendar on the top right), you can do so by checking .
?view=month (or day, week, etc.) at the end of the URL (see also Preselect a date or view). This can be useful to access a view yourself that you’ve hidden from your users.
The Agenda list view functions differently from the other views. Here, registered users can see all their bookings in one place. This view is just for checking existing bookings, not for making new ones and can therefore only be seen when users login. In list views, such as the Agenda view, you can customize which appointment details are displayed. Only fields that are actively used will show up. You can manage them under Configure > Process

www.supersaas.com with m.supersaas.com in the URL.
Vertical size
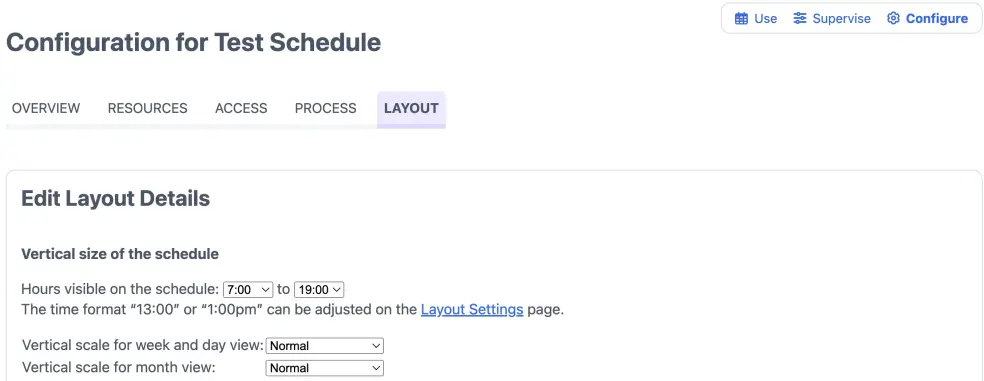
The vertical size (height) of your schedule is determined by the hours that are visible on the schedule and its vertical scale, which relates to the height of individual slots and the number of slots that make up an hour. Both of these aspects can be controlled on the Configure > Layout tab of your schedule.

Visible hours
Via Configure > Layout you can set the visible hours as used in the Week and Day views. These can differ from the actual opening hours. This distinction is useful if you would like to allow appointments to be made late at night, but you don’t want to display these irregular hours by default.
When appointments are made outside opening hours the visible hours are automatically adjusted for just that week so that all appointments can be shown. The Month view’s vertical size isn’t scaled when there are appointments outside the visible hours as this would look quite messy. Instead, a text is shown at the top of a day’s slot, indicating the number of non-visible appointments.
Vertical scale
Vertical scale lets you control the height of a day. In the Week and Day views, days are divided into hours and by default the hours are subdivided into 30-minute intervals. Especially when you have many short appointments, increasing the vertical scale can make your schedule look much less cluttered. On the other hand, if you have only one or two appointments per day, a smaller vertical scale will look better.
On the Week and Day views you can increase the height by changing the number of subdividers; i.e. 20 min./interval (3 per hour), 15 min./interval (4 per hour) or 10 min./interval (6 per hour). Note that you can draw empty slots independently of the way the calendar is subdivided. So you could draw four empty slots of 15-minute length on a schedule that has hours divided into 30-minute subdivisions, or vice versa. What looks best depends on how much information you want to show in each slot. (The Resource schedule is configured by default not to draw any empty slots, but it can be made to do so using the “Start time constraints” box on the “Resources” tab of the configuration page).